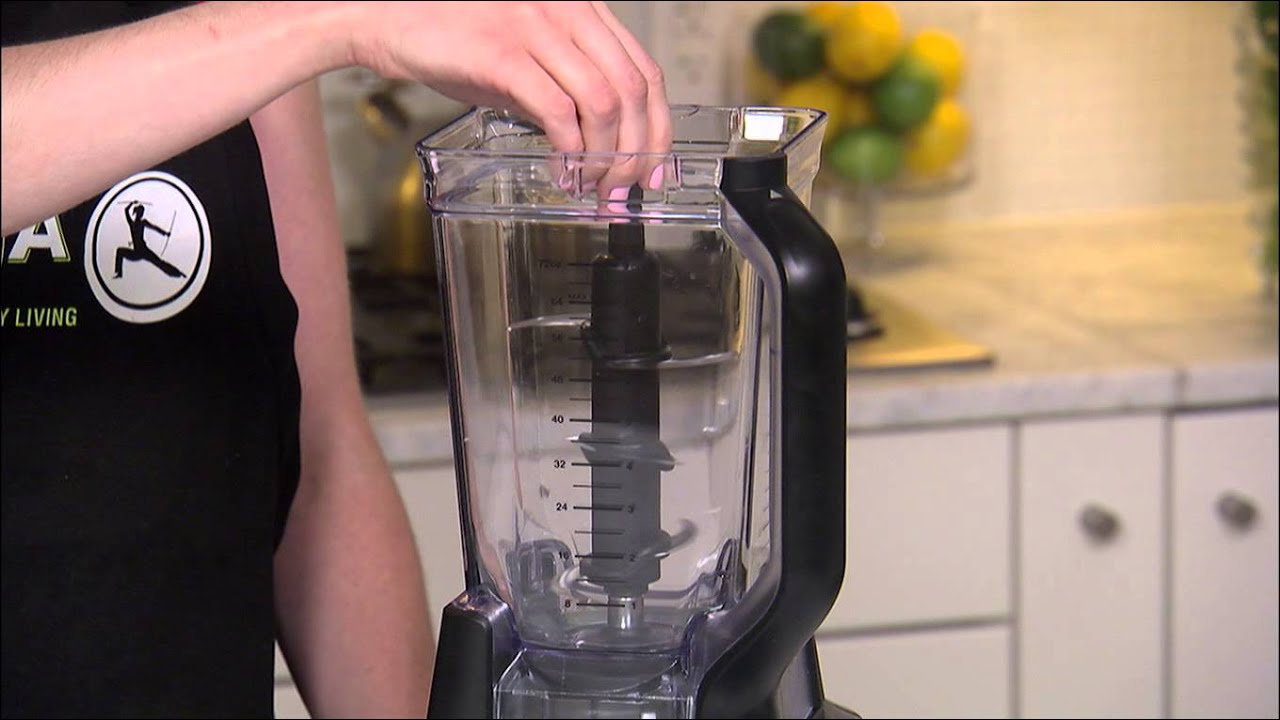
Grip the pitcher, twist counterclockwise, and lift straight up to remove the Ninja blender from base.
I’ve worked with many kitchen tools and fixed stuck blenders more times than I can count. This guide explains exactly how to remove ninja blender from base safely, why it sticks, and what to do after you free it. Read on for step-by-step instructions, safety tips, and practical fixes I’ve used in real life.

Why your Ninja blender may be stuck to its base
Blenders can stick for a few simple reasons. Food, gaskets, or sticky residue can lock the jar to the base. Worn or misaligned parts also cause binding. Knowing the cause helps you choose the best method to remove the pitcher without damage.
Common causes include:
- Food or liquid trapped at the sealing ring
- Cold or hot expansion causing tight fit
- Bent or warped base coupler
- Safety lock engaged or electrical interlocks not aligned
From my experience, most stuck cases happen after blending thick mixtures. A quick soak and twist usually frees the jar. Learning how to remove ninja blender from base starts with inspecting seals and cleaning lightly.

Step-by-step: How to remove ninja blender from base
Follow these simple steps to safely remove the pitcher. Read each step before you act and keep your hands clear of blades.
- Unplug the blender
- Make sure the blender is unplugged. This prevents the motor from running if the safety switch gets bumped.
- Release the lid and pour out contents
- Remove the lid and pour any leftover liquid. Wipe the rim so the jar sits flat.
- Check for safety locks
- Inspect the base for a safety latch or locked position. Some models need the jar aligned at a specific notch to lift.
- Twist counterclockwise while lifting straight up
- Grip the jar at the handle and base. Twist gently counterclockwise and lift straight up. Avoid angling the jar.
- Use a gentle heat or cold trick if it won’t budge
- Warm the base with a warm cloth for a minute to expand plastic slightly. Or cool the pitcher briefly to shrink it. Alternate methods help when suction is the issue.
- Apply a thin pry with a rubber tool if needed
- Use a rubber spatula or jar opener to gently pry at the seam. Don’t insert metal near blades. Small, gentle pressure is better than brute force.
- Clean the gasket and reattempt removal
- If the gasket is sticky, clean around it with soapy water and reattempt the twist. A little lubrication from soapy water can help.
If the pitcher still won’t release, stop and try the troubleshooting steps below. Avoid forcing the jar, which can damage the base or blade assembly. Knowing how to remove ninja blender from base safely reduces the risk of breaking parts.

Safety tips and tools for removing a Ninja blender from base
Safety matters. Use low-risk tools and calm moves. These tips protect you and your blender.
Recommended tools:
- Rubber jar opener for grip
- Soft cloths or towels
- Warm water in a bowl
- Rubber spatula (non-metal)
- Gloves for heat and grip
Safety steps:
- Always unplug the unit before touching the blade area.
- Keep fingers away from blades; use a tool when prying.
- Work on a stable surface with good light.
- If the base shows cracks, avoid further force and consult support.
I once tried to pry a stuck jar with a spoon and nicked the blade housing. That led to costly repairs. Use the right tool and gentle pressure. Practicing safe removal is part of learning how to remove ninja blender from base without harm.
Cleaning and maintenance after you remove Ninja blender from base
After removal, clean parts well. This prevents future sticking.
Quick cleaning steps:
- Disassemble the blade assembly carefully.
- Rinse the jar, gasket, and blade under warm water.
- Use mild dish soap and a soft brush to remove residue.
- Inspect the gasket for wear and replace if brittle or torn.
- Let parts air dry fully before reassembly.
Regular maintenance tips:
- Dry the sealing ring after each use to avoid suction.
- Check the coupler for food buildup monthly.
- Replace the gasket annually if you use the blender often.
I recommend drying the jar upside down on a rack for 30 minutes. My own Ninja stayed trouble-free longer after I made drying a habit. Doing these steps keeps the base release smooth and makes how to remove ninja blender from base quick next time.
Troubleshooting: when the blender still won't release
If the pitcher resists, try these focused fixes. Each solution is low risk.
Check alignment and locks:
- Make sure the pitcher is aligned with the base notch. Re-seat and try the twist again.
- Listen for a click; that often means it’s in the release position.
Use temperature changes carefully:
- Wrap the base with a warm damp cloth for 60 seconds to expand plastic slightly.
- Chill the pitcher for a few minutes if you suspect expansion caused the jam.
- Alternate warming and cooling in short bursts if the first attempt fails.
When to stop and get help:
- If plastic cracks, the base is warped, or electrical parts are exposed, stop.
- Contact customer support, a service center, or a repair pro rather than forcing removal.
PAA-style quick questions
- Can lubricants help release a stuck blender jar? A small amount of soapy water often works. Avoid oil-based lubricants near blades and food paths.
- Is it safe to use heat on the base? Use only warm, not hot, cloths. High heat can damage plastic parts and seals.
- Should I remove the blade assembly to free the jar? Only remove blades if you are comfortable and the manufacturer allows it. Always unplug the unit first and follow the manual.
If none of these work, professional help prevents further damage. Knowing how to remove ninja blender from base includes knowing when to stop.

Frequently Asked Questions of how to remove ninja blender from base
How do I remove a stuck Ninja blender pitcher without tools?
Unplug the blender, remove the lid, and try a gentle counterclockwise twist while lifting straight up. Warm the base with a damp cloth for a minute to loosen stuck seals if needed.
Can I use hot water to free the blender jar?
Use warm water only. High heat can warp plastic and damage seals. Warmth helps expand the base slightly and ease separation.
What if the gasket is stuck and sticky?
Remove and clean the gasket with warm, soapy water and a soft brush. Replace the gasket if it shows cracks or severe wear.
Is it safe to pry the jar with a metal tool?
No. Metal tools can damage the blade area and create safety risks. Use a rubber spatula or jar opener instead and apply gentle pressure.
When should I contact customer support or a repair shop?
Contact support if plastic parts crack, electrical components expose, or the jar won’t budge after safe attempts. Professional service is safer than forcing parts and causing more damage.
Conclusion
You can remove a Ninja blender from base using safe, steady steps: unplug, check locks, twist counterclockwise, and lift straight up. Inspect seals, use gentle warmth, and avoid metal prying to prevent damage. From my hands-on experience, patience and small adjustments are the keys to success.
Try these steps today and make removal part of your routine. If this helped, leave a comment, share your tip, or subscribe for more simple kitchen fixes.